

Overview
CONNECT → Integrations is Studio’s catalog of external systems a project can be plugged into. You browse the catalog, pick a system, and fill in the connection details it asks for. The catalog’s own subtitle sets the framing: “Browse the catalog to plug NativeFlow into the systems your enterprise already runs.” Two integrations are connectable today, both under Serverless Business Logic:- AWS Lambda
- Azure Functions
The empty catalog, the full Add integration dialog, a search for "cognito" (no match), and reading the AWS Lambda and Azure Functions connect forms.
Open the catalog
Expand CONNECT in the left sidebar and click the plug icon. The group is collapsed by default and its buttons do not exist in the page until you expand it. On a project with nothing connected you get a three part empty state: a left column listing the catalog’s ten categories, a “No integrations yet” message, and a centred card with an Add integration button.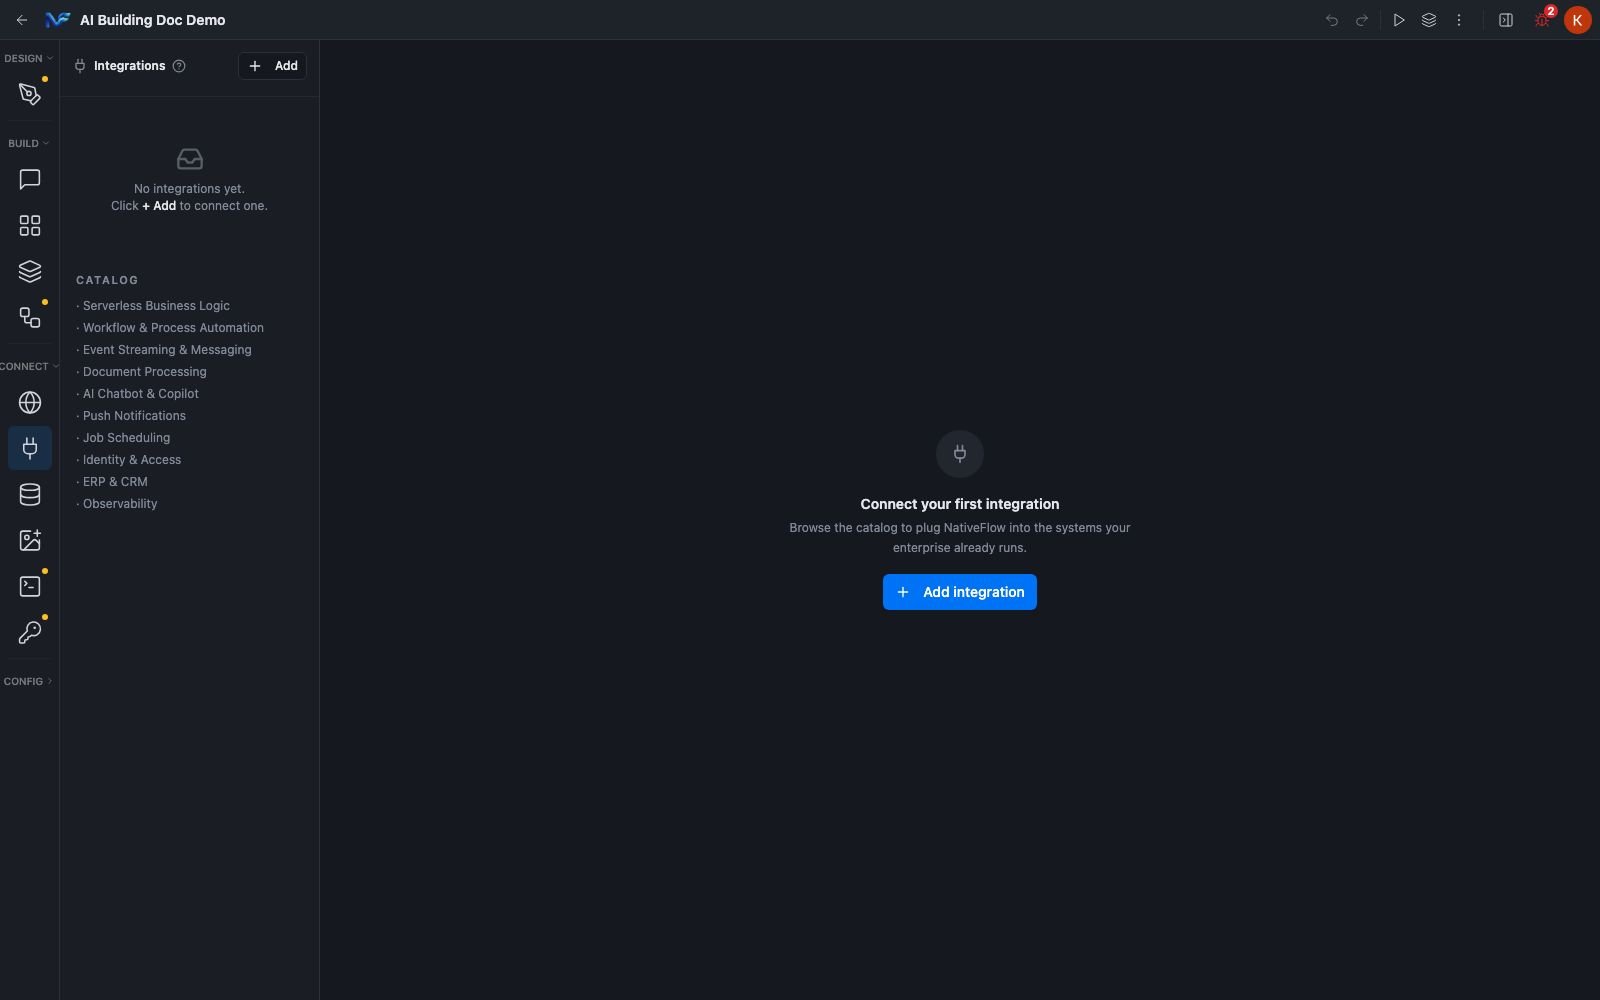
The Integrations pane: a No integrations yet message, a CATALOG list of ten categories down the left, and a centred Connect your first integration card
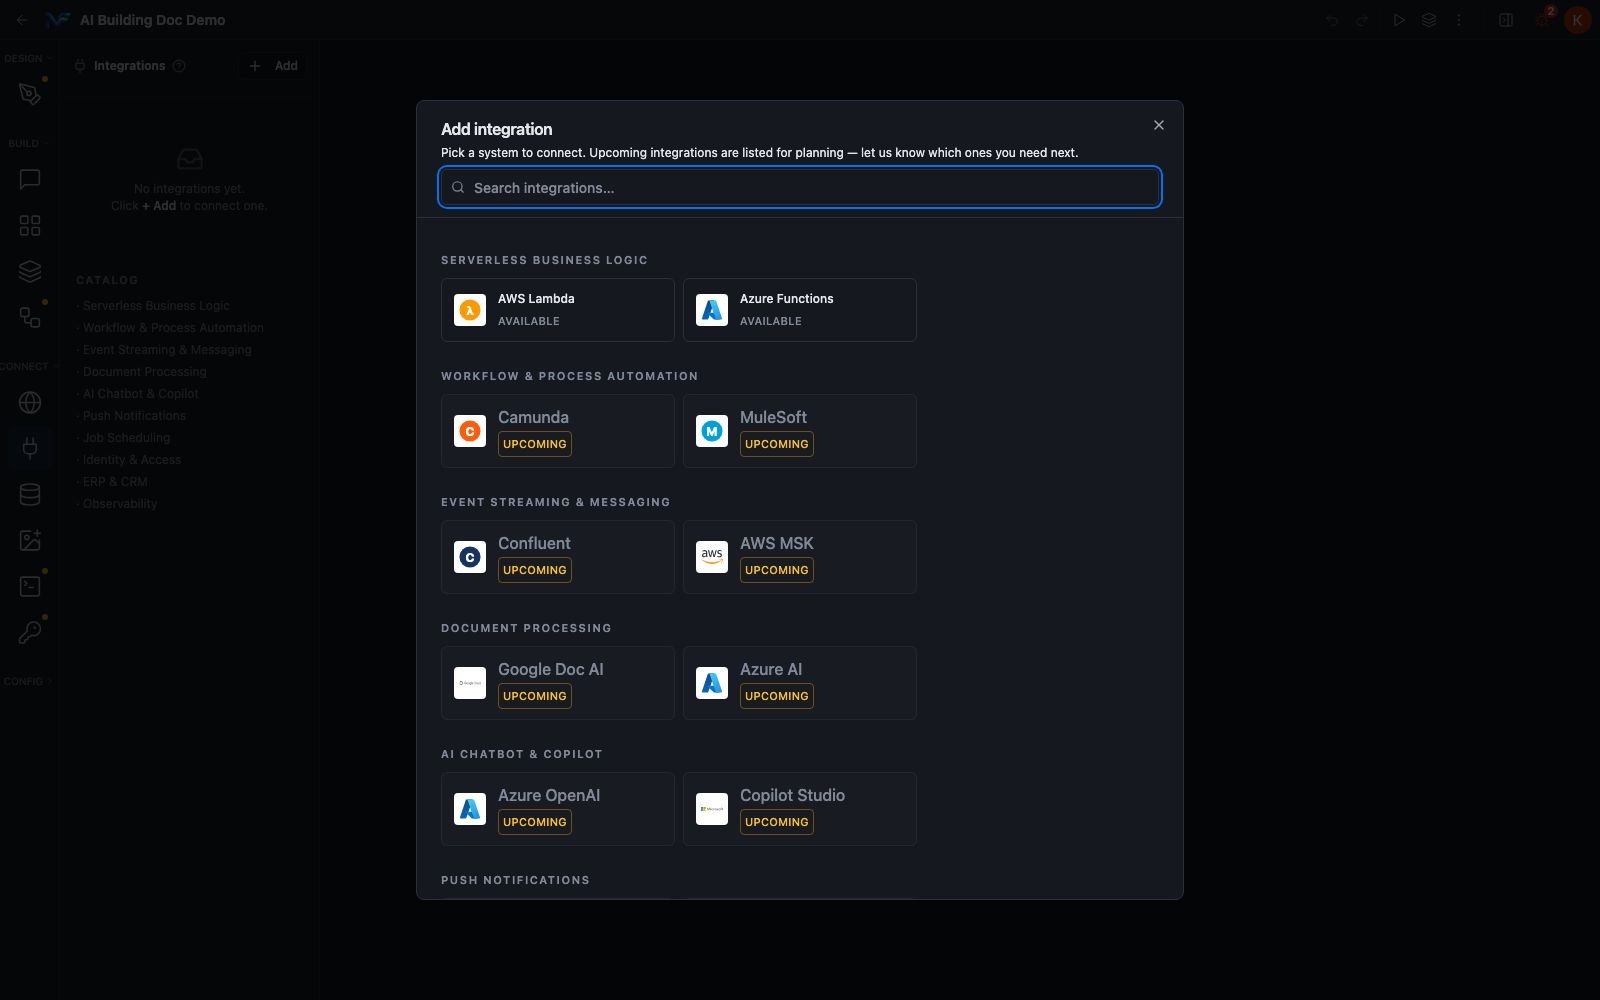
The Add integration dialog, upper half: a search box, then SERVERLESS BUSINESS LOGIC with AWS Lambda and Azure Functions
Connecting AWS Lambda
Click the AWS Lambda tile. The dialog is headed as Step 1, connect provider, and states plainly that the integration is added to your project only after verification succeeds. Its instruction: create an IAM role in your AWS account that trusts NativeFlow’s deployer using the External ID shown in the form, then paste the role ARN.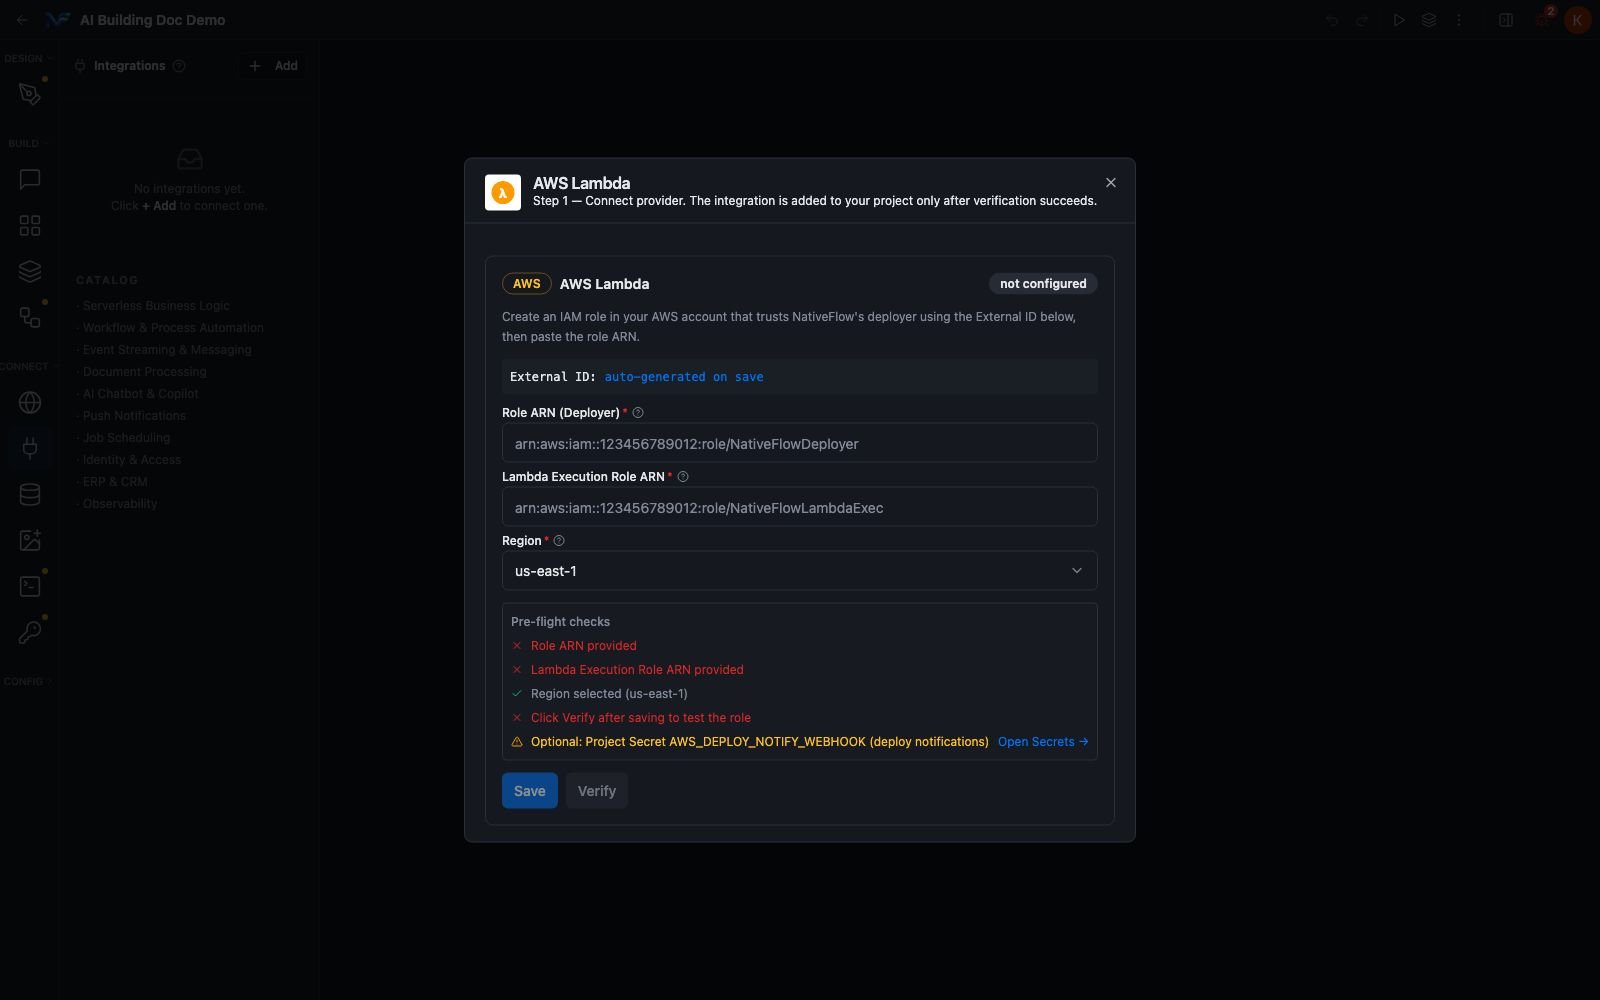
The AWS Lambda connect dialog: a not configured status chip, an External ID row reading auto-generated on save, Role ARN (Deployer), Lambda Execution Role ARN, a Region dropdown on us-east-1, a four item pre-flight checks list, and Save and Verify buttons
us-east-1, us-east-2, us-west-1, us-west-2, eu-west-1, eu-west-2, eu-central-1, ap-south-1, ap-southeast-1, ap-southeast-2 and ap-northeast-1.
Below the fields is a live Pre-flight checks list that turns red or green as you fill the form, and a warning row about an optional Project Secret for deploy notifications. Verify stays greyed out until you Save.
Connecting Azure Functions
Same dialog shape, different fields. Its instruction: create a Service Principal with Contributor on your Function App, then store the client secret in Project Secrets asAZURE_CLIENT_SECRET with server only visibility.
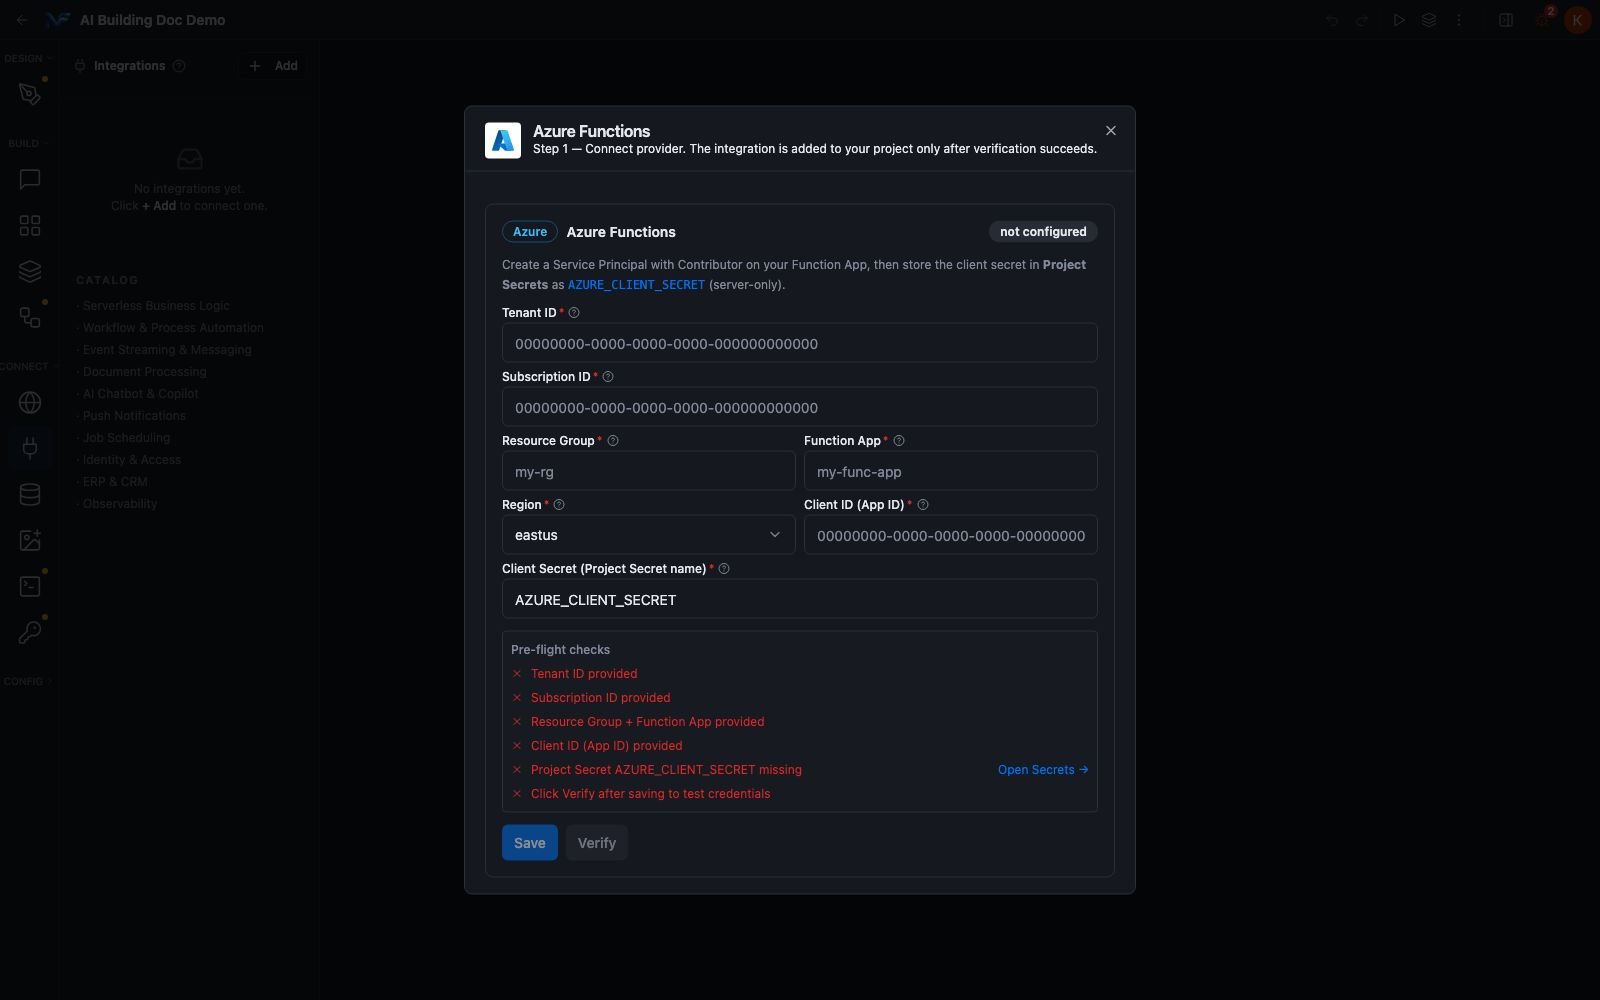
The Azure Functions connect dialog: Tenant ID, Subscription ID, Resource Group, Function App, a Region dropdown on eastus, Client ID (App ID), a Client Secret field pre-filled with AZURE_CLIENT_SECRET, a six item pre-flight list, and Save and Verify
Where the two providers lead: Cloud Functions
Connecting AWS Lambda or Azure Functions does not put an endpoint in the API Calls pane. It unlocks a separate Cloud Functions workspace where you author, publish and invoke functions from inside Studio.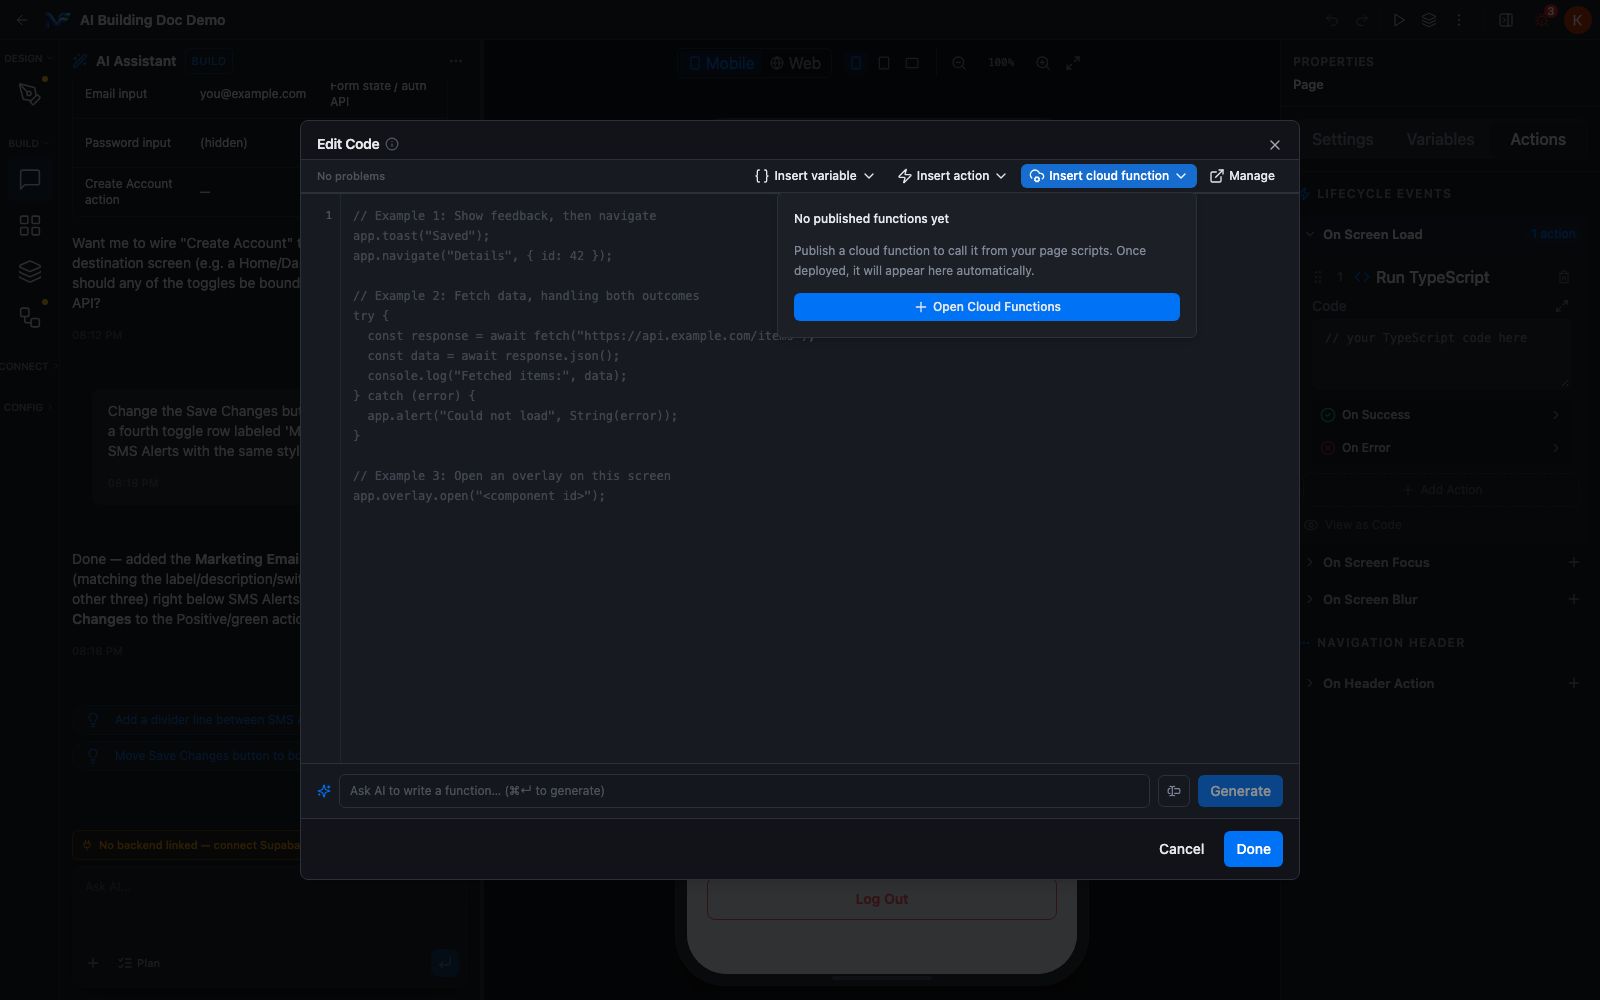
The expanded Edit Code dialog for a Run TypeScript action, its toolbar showing Insert variable, Insert action, Insert cloud function and Manage, with the Insert cloud function popover open on its no published functions yet empty state
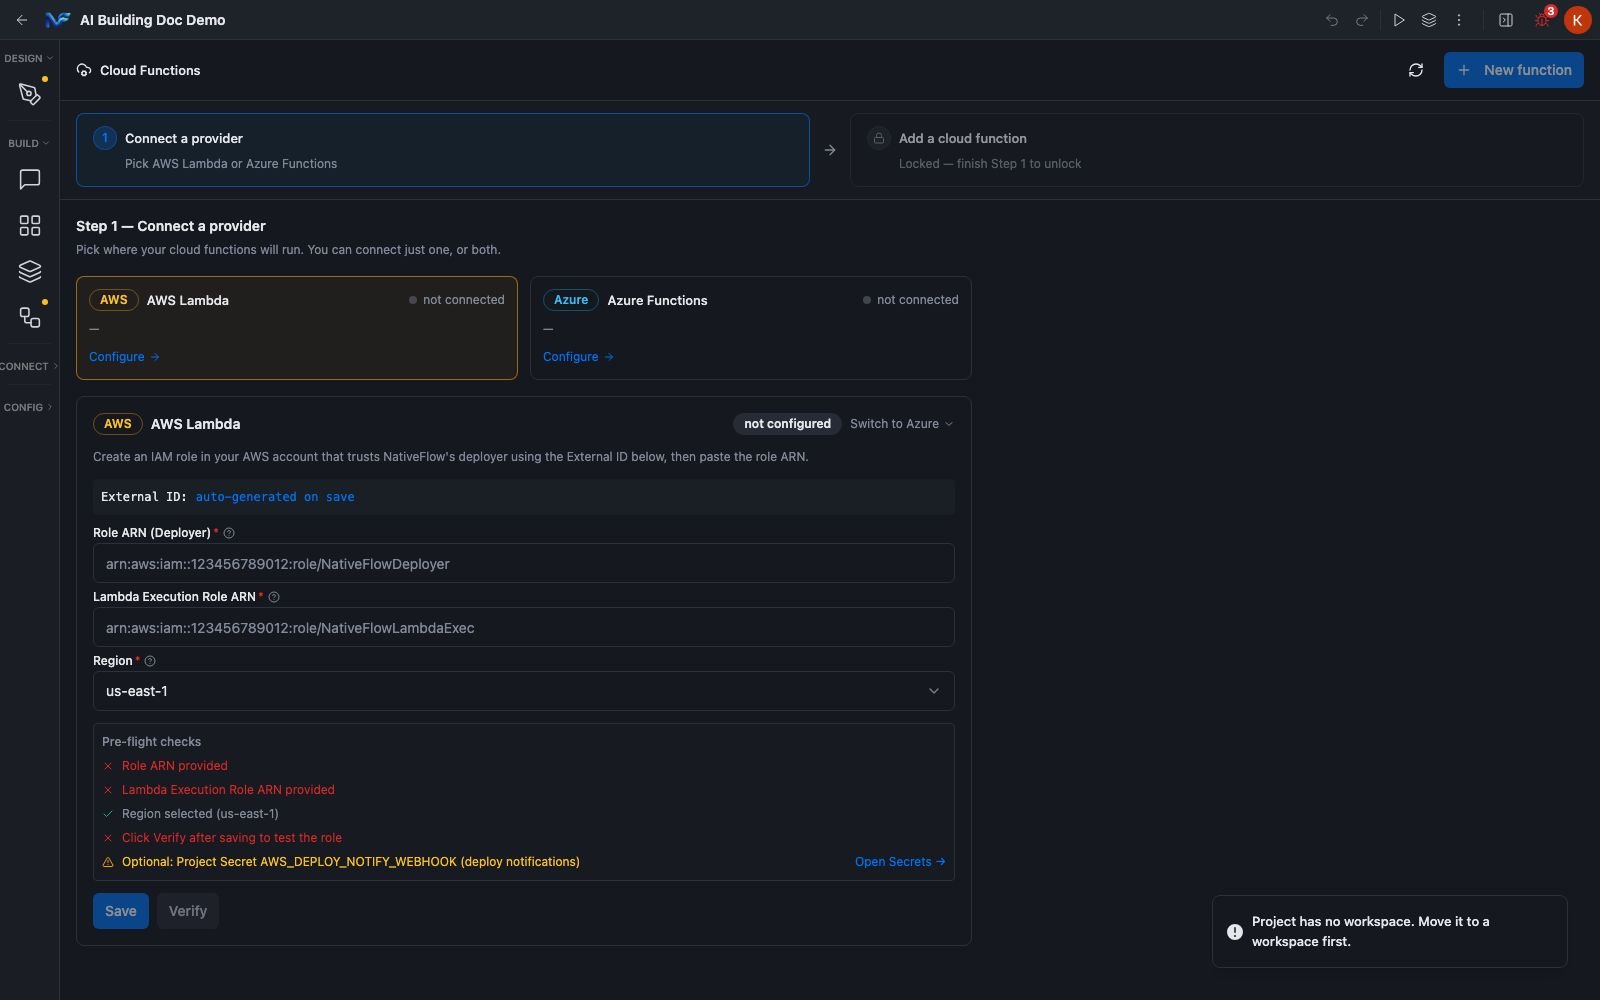
The Cloud Functions panel: the two card progress strip, the AWS Lambda and Azure Functions cards, and the full provider form below
error rather than catching.
Supabase: linking and schema work
Connecting Supabase happens at CONNECT → Database, and it is a credential free authorization handoff: one button, then you authorize NativeFlow on Supabase’s own site and pick or create a project. There is no project URL, anon key or service role field anywhere in the unlinked state.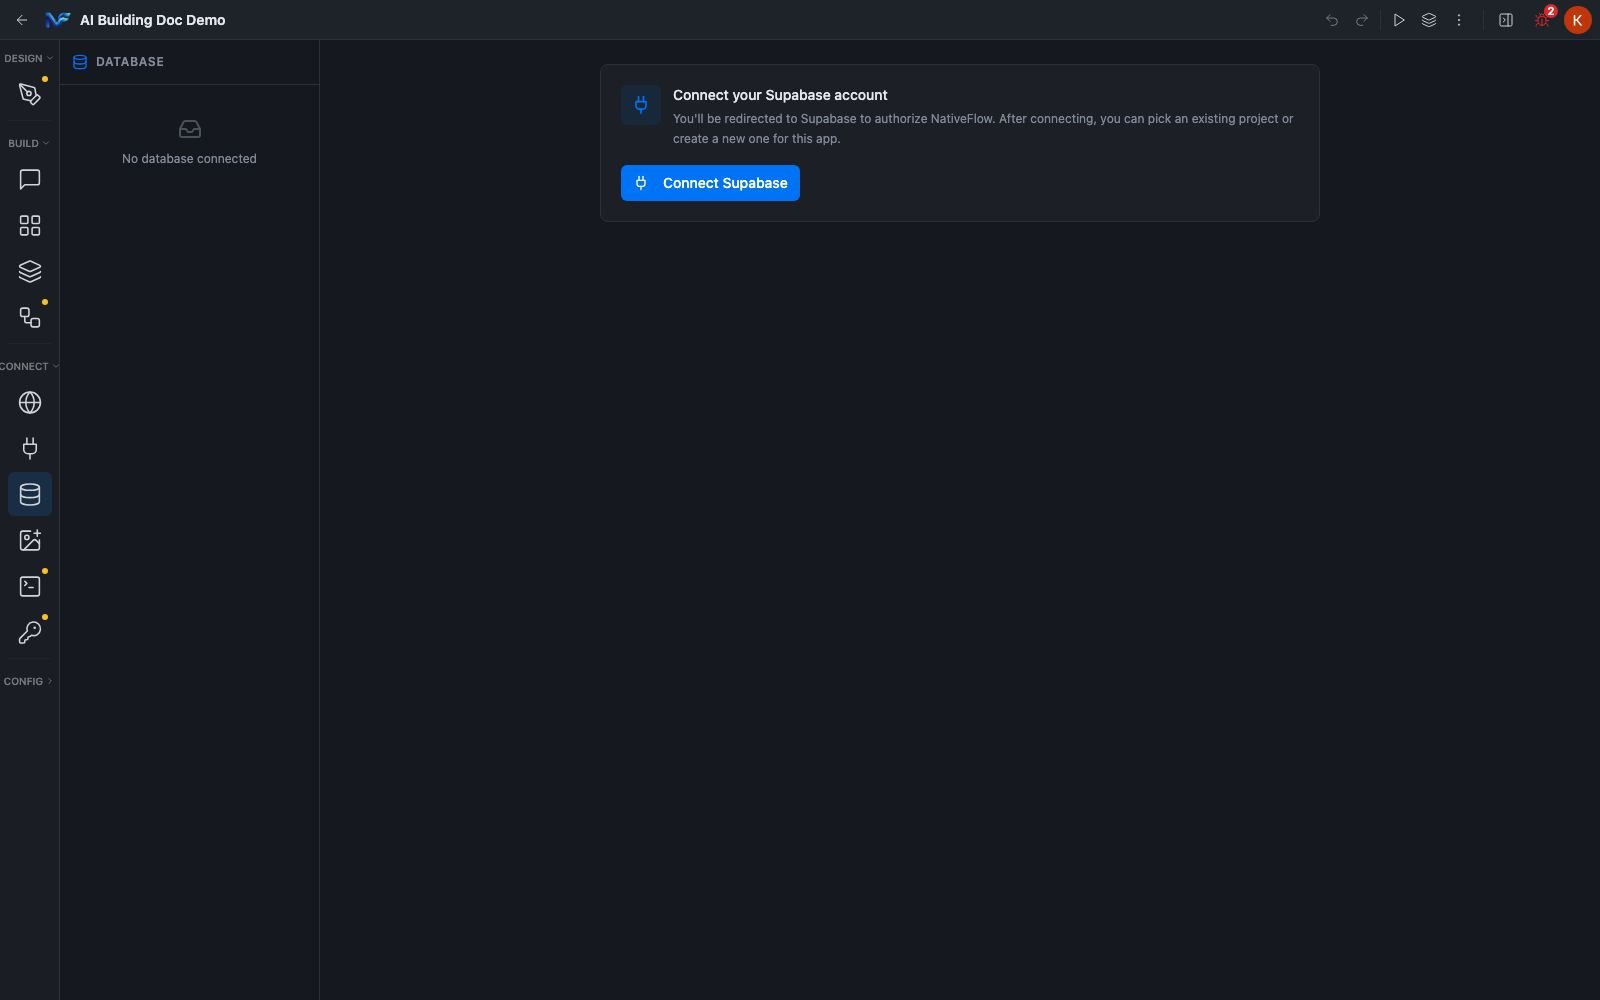
The Database pane: a left panel reading No database connected, and a card headed Connect your Supabase account with a blue Connect Supabase button
backend tool group of nineteen tools covering exactly this ground: listing tables, creating a table, altering and dropping tables, enabling RLS, creating and listing policies, creating indexes, an arbitrary SQL escape hatch, Supabase edge function management, and two tools that turn a table or an edge function into an entry in the API Calls pane.
A few of those tool descriptions are worth reading as design decisions:
Identity backends
Open CONFIG → Security, turn authentication on, and open the Backend dropdown. It offers Supabase, Auth0, WorkOS and Custom JWT.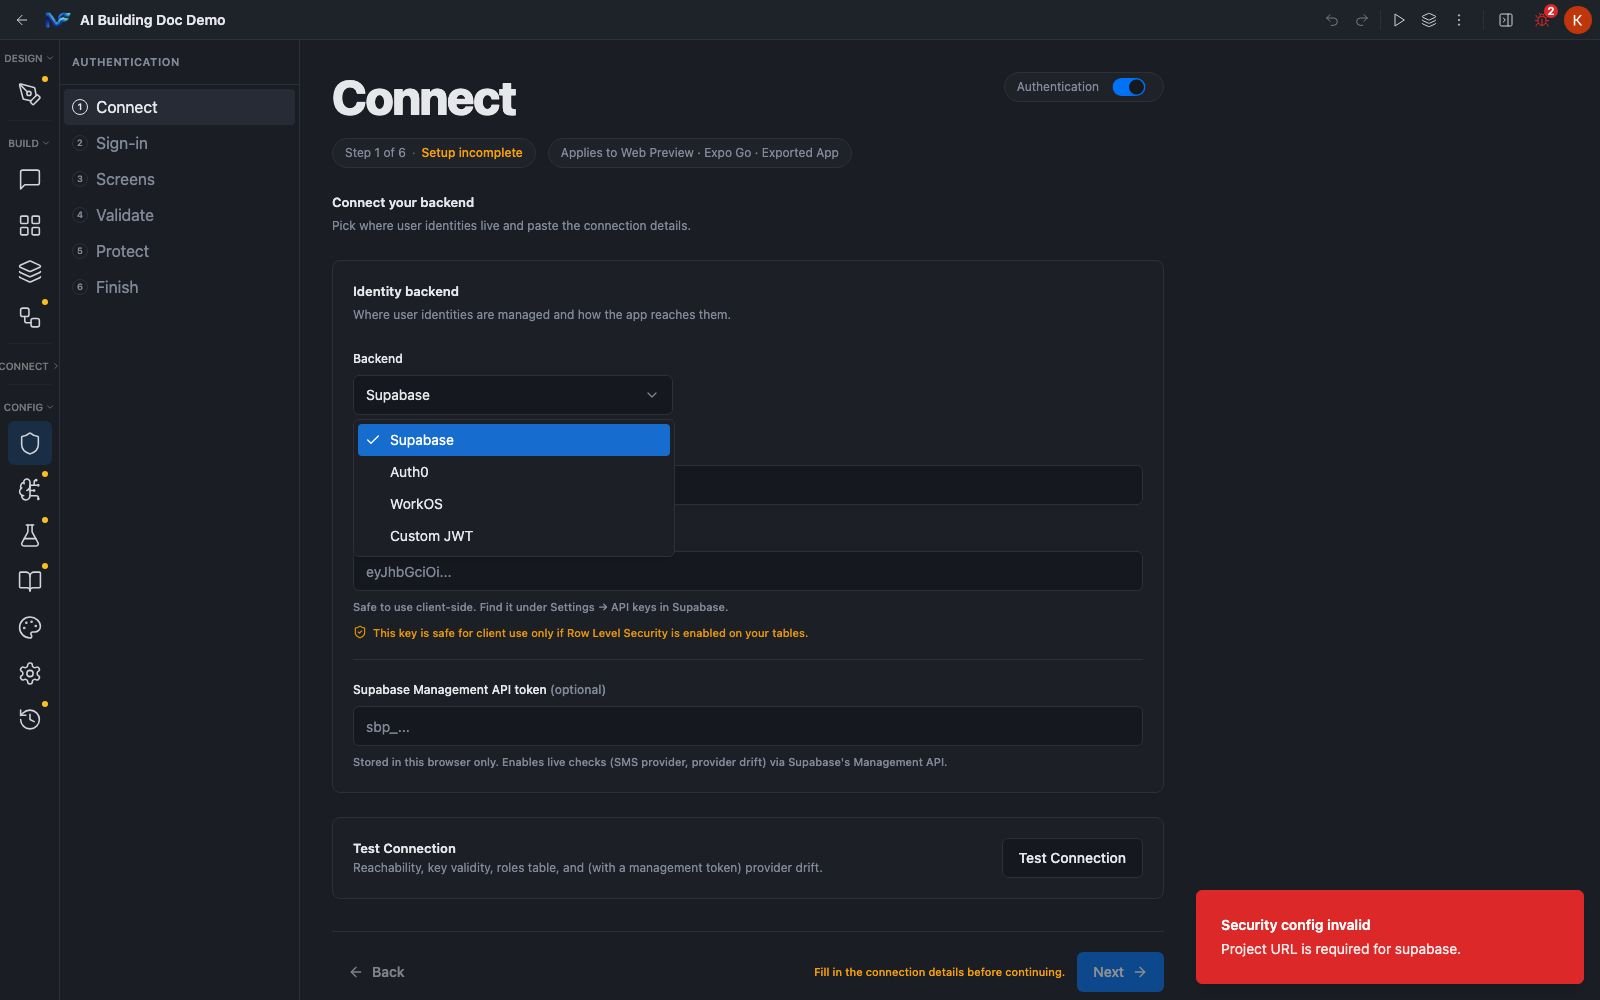
The Connect step of the authentication wizard with the Backend dropdown open, showing Supabase ticked plus Auth0, WorkOS and Custom JWT, and behind it the Supabase fields with their Row Level Security warning
Custom JWT
Select Custom JWT in the Backend dropdown and Studio asks for endpoints rather than an SDK.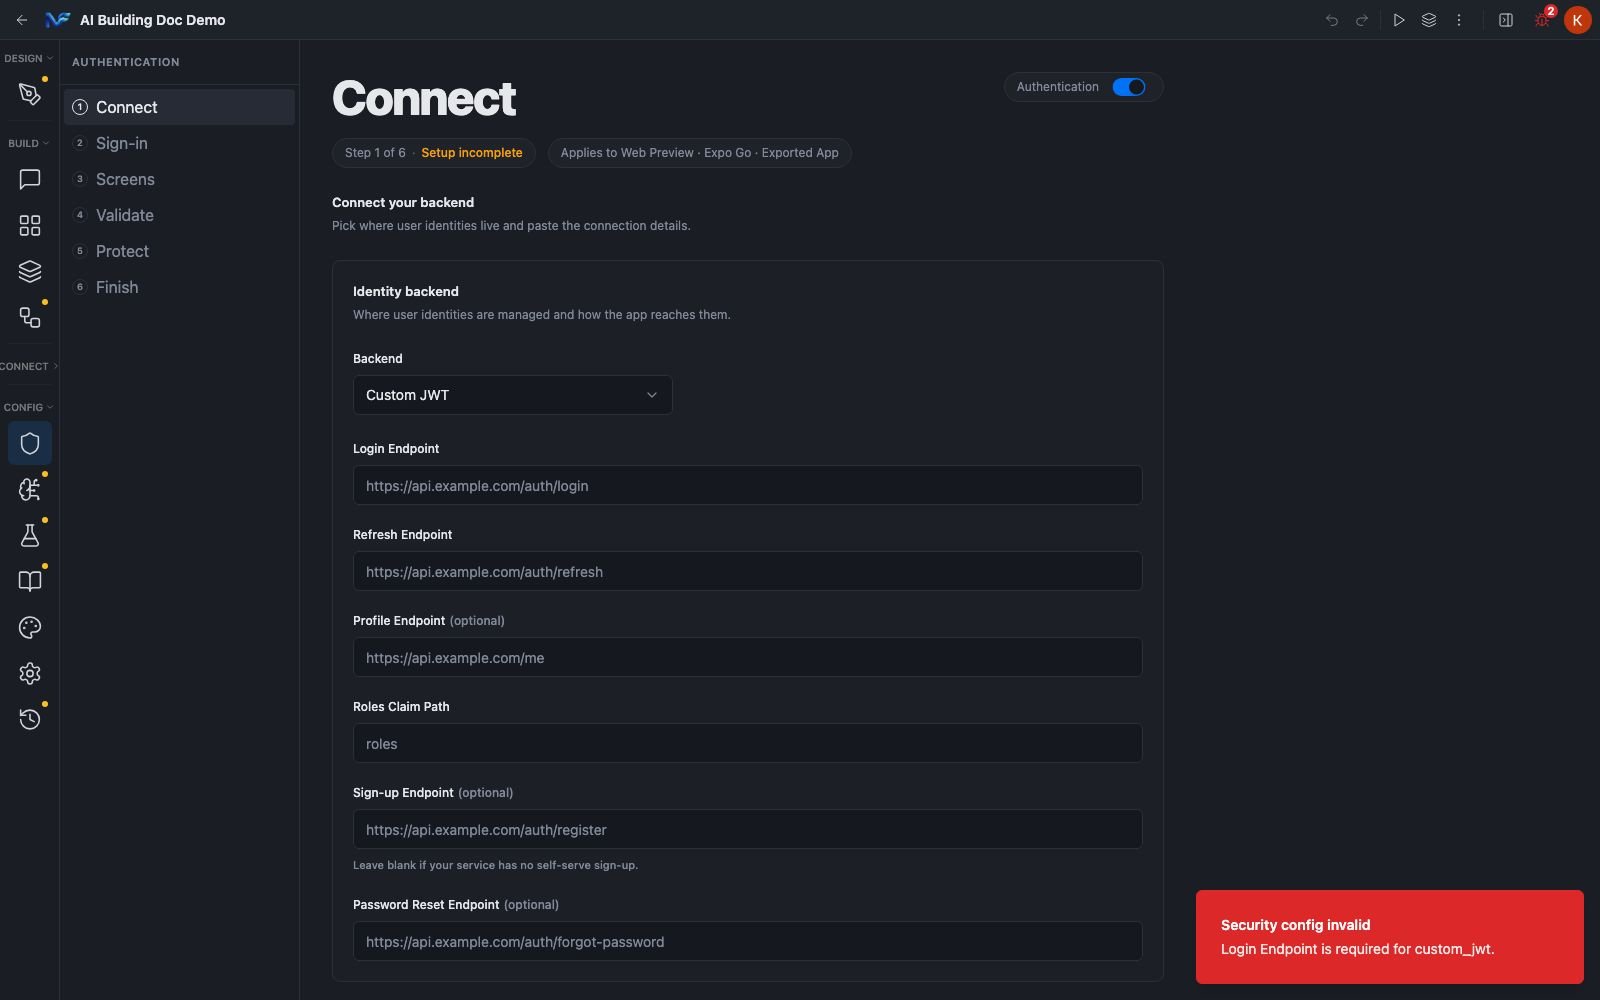
The Connect step with Backend set to Custom JWT, showing Login Endpoint, Refresh Endpoint, Profile Endpoint, Roles Claim Path, Sign-up Endpoint and Password Reset Endpoint